背景
前端组件被业务依赖,需要保证其可靠性
前端组件需要迭代,则完整、可靠的测试用例可保证迭代安全
良好的测试可以让开发人员在开发时不再关注测试,提高工作效率
对业务代码的要求 要构建良好的测试,对被测代码也有一定的要求。
保持代码短小精悍,命令型代码块(do something)和查询型代码块(get something)需要分割至不同的函数
使用代码校验工具,比如 eslint
圈复杂度,又称代码分支,也就是代码中 if else 的数量,尽量少于 5,有助于提升测试覆盖率
不出现重复代码
代码需要注释
测试工具选型 测试框架选型:
Qunit
jasmine
mocha
前端组件的使用场景中,有大量的异步操作。上述 3 个测试框架,只有 mocha 可以很方便地进行异步测试。所以,测试框架使用 mocha。
断言库选型:
better-assert,C-style TDD 断言库
should.js,BDD 风格断言库
expect.js, 追求极简的 BDD 风格断言库,基于 should.js 简化
chai, BDD/TDD 双模 ,同时支持 should / expect / assert 三种风格的断言库强大插件机制
google mocha 的使用教程,断言库都是 chai,所以。。。。。。
代码覆盖率工具
istanbul
。。。
javascript 的代码覆盖率工具中,istanbul 流行度最高。
UI 测试模式选型:
casperjs+phantomjs,phantomjs 是无界面浏览器,casperjs 对 phantomjs api 进行了提高易用性的封装
Selenium 1,会起一个服务,开发人员给这个服务发布任务,服务会通过给浏览器注入 javascript 的方式驱动浏览器
webdriver,直接调用浏览器自动化的本地接口,驱动浏览器;可以直接在浏览器中运行。
Selenium 2,集成了 webdriver。UI 测试时会启动一个服务,开发人员给这个服务发布任务,服务会通过 webdriver 驱动浏览器
chrome 的 headless 模式,就是 chrome 的无界面模式,可以通过其自身暴露的 api 进行驱动,也可以通过 webdriver 驱动。
chrome 的 headless 模式发布后,phantomjs 的作者已经宣布不再维护 phantomjs。第一个方案否决。
和 selenium 服务通信的工具选型
selenium-webdriver,社区活跃,在 npm 上看到下载量最高
webdriverIO,api 比 selenium-webdriver 友好,但配套测试工具配置起来比 selenium-webdriver 的要麻烦,npm 下载量是 selenium-webdriver 的 0.1 倍
WD.js,没用过,npm 下载量同样是 selenium-webdriver 的 0.1 倍。
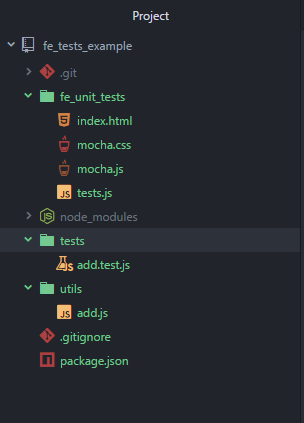
测试的基本概念 我们可以构建一个简单的项目,在这个过程中了解测试的基本概念
1
2
3
4
5
mkdir fe_tests_example cd fe_tests_example npm init npm install -g mocha npm install mocha chai --save
建立文件 ./utils/add.js
1
2
3
module.exports = function(a, b) { return a + b; };
建立文件 ./tests/add.test.js
1
2
3
4
5
6
7
8
9
10
11
12
13
14
15
var expect = require('chai').expect; var add = require('../utils/add'); describe('add 方法测试', function() { it('2+2=4', function() { expect(add(2, 2)).to.be.equal(4); }); it('5+6=11', function() { expect(add(5, 6)).to.be.equal(11); }); it('0+(-2)=-2', function() { expect(add(0, -2)).to.be.equal(-2); }); });
运行指令
可以看到
1
2
3
4
5
6
7
8
9
10
11
D:\work\fe_tests_example (master) (fe_tests_example@1.0.0) λ mocha tests\*.js add 方法测试 √ 2+2=4 √ 5+6=11 √ 0+(-2)=-2 3 passing (21ms)
这就是一次单元测试。
其中,add.test.js 是测试脚本,一个个 it 代码块就是一个个测试用例。
接下来是在浏览器环境下进行单元测试:
1 mocha init fe_unit_tests
可以看到项目下多了个 fe_unit_tests 文件夹
建立 fe_unit_tests/add.js 文件
1
2
3
function add(a, b) { return a + b; };
修改 fe_unit_tests/tests.js 文件:
1
2
3
4
5
6
7
8
9
10
11
12
13
var expect = chai.expect; describe('add 方法测试', function() { it('2+2=4', function() { expect(add(2, 2)).to.be.equal(4); }); it('5+6=11', function() { expect(add(5, 6)).to.be.equal(11); }); it('0+(-2)=-2', function() { expect(add(0, -2)).to.be.equal(-2); }); });
修改 fe_unit_tests/index.html 文件
1
2
3
4
5
6
7
8
9
10
11
12
13
14
15
16
17
18
19
20
<!DOCTYPE html> <html> <head> <title>Mocha</title> <meta http-equiv="Content-Type" content="text/html; charset=UTF-8"> <meta name="viewport" content="width=device-width, initial-scale=1.0"> <link rel="stylesheet" href="mocha.css" /> </head> <body> <div id="mocha"></div> <script src="mocha.js"></script> <script src="http://chaijs.com/chai.js"></script> <script>mocha.setup('bdd');</script> <script src="add.js"></script> <script src="tests.js"></script> <script> mocha.run(); </script> </body> </html>
这就是浏览器环境下的单元测试
UI 测试 我们将继续通过实例项目来了解 UI 测试
下载最新的JDK ,安装之。selenium ,一个 jar 包,不用安装。
1 java -jar selenium-server-standalone-2.45.0.jar
可以看到
1
2
3
4
5
6
7
8
9
10
11
12
13
14
15
16
λ java -jar selenium-server-standalone-3.4.0.jar 15:15:07.198 INFO - Selenium build info: version: '3.4.0', revision: 'unknown' 15:15:07.200 INFO - Launching a standalone Selenium Server 2017-06-06 15:15:07.250:INFO::main: Logging initialized @549ms to org.seleniumhq.jetty9.util.log.StdErrLog 15:15:07.345 INFO - Driver class not found: com.opera.core.systems.OperaDriver 15:15:07.349 INFO - Driver provider com.opera.core.systems.OperaDriver registration is skipped: Unable to create new instances on this machine. 15:15:07.350 INFO - Driver class not found: com.opera.core.systems.OperaDriver 15:15:07.351 INFO - Driver provider com.opera.core.systems.OperaDriver is not registered 15:15:07.352 INFO - Driver provider org.openqa.selenium.safari.SafariDriver registration is skipped: registration capabilities Capabilities [{browserName=safari, version=, platform=MAC}] does not match the current platform VISTA 2017-06-06 15:15:07.453:INFO:osjs.Server:main: jetty-9.4.3.v20170317 2017-06-06 15:15:07.521:INFO:osjsh.ContextHandler:main: Started o.s.j.s.ServletContextHandler@28d25987{/,null,AVAILABLE} 2017-06-06 15:15:07.900:INFO:osjs.AbstractConnector:main: Started ServerConnector@3f49dace{HTTP/1.1,[http/1.1]}{0.0.0.0:4444} 2017-06-06 15:15:07.901:INFO:osjs.Server:main: Started @1200ms 15:15:07.901 INFO - Selenium Server is up and running
下载对应的浏览器驱动
在这里,我下载了 chrome、firefox、ie 的驱动,和刚才下好的 selenium jar 包放入同一个文件夹。
这里有需要注意的几个点:
chrome 的驱动,最新的是 2.2X 那些,2.4 是很老的版本。
IE 的 webdriver 驱动 IE 失败的话,尝试下修改注册表:注册表(regedit)中,32 位系统寻找 HKEY_LOCAL_MACHINE\SOFTWARE\Microsoft\Internet Explorer\Main\FeatureControl\FEATURE_BFCACHE ,64 位系统寻找 HKEY_LOCAL_MACHINE\SOFTWARE\Wow6432Node\Microsoft\Internet
ps:上面是自行安装配置使用 selenium 服务的方法。还可以通过工具包对 selenium 进行安装配置使用,具体请看ui-h5-dialog 组件 test 分支的 test_guide.md
接下来,回到 fe_tests_example 项目中
1 npm install selenium-webdriver --save
建立 ui_tests/test1.js 文件
1
2
3
4
5
6
7
8
9
10
11
12
13
14
15
16
17
18
19
20
21
22
23
24
25
26
27
28
29
30
31
32
33
34
35
36
37
38
var webdriver = require('selenium-webdriver'), By = webdriver.By, until = webdriver.until, test = require('selenium-webdriver/testing'); test.describe('百度搜索测试1,firefox浏览器', function() { this.timeout(15000); var driver; test.before(function() { driver = new webdriver.Builder().forBrowser('firefox').usingServer('http://localhost:4444/wd/hub').build(); }); test.it('搜索node.js', function() { driver.get('http://www.baidu.com'); driver.findElement(By.name('wd')).sendKeys('node.js'); driver.findElement(By.id('su')).click(); driver.wait(until.titleIs('node.js_百度搜索'), 10000); }); test.it('搜索jquery', function() { driver.get('http://www.baidu.com'); driver.findElement(By.name('wd')).sendKeys('jquery'); driver.findElement(By.id('su')).click(); driver.wait(until.titleIs('jquery_百度搜索'), 10000); }); test.it('搜索angular', function() { driver.get('http://www.baidu.com'); driver.findElement(By.name('wd')).sendKeys('angular'); driver.findElement(By.id('su')).click(); driver.wait(until.titleIs('angular_百度搜索'), 10000); }); test.after(function() { driver.quit(); }); });
建立 ui_tests/test2.js 文件
1
2
3
4
5
6
7
8
9
10
11
12
13
14
15
16
17
18
19
20
21
22
23
24
25
26
27
28
29
30
31
32
33
34
35
36
37
38
var webdriver = require('selenium-webdriver'), By = webdriver.By, until = webdriver.until, test = require('selenium-webdriver/testing'); test.describe('百度搜索测试2,chrome浏览器', function() { this.timeout(15000); var driver; test.before(function() { driver = new webdriver.Builder().forBrowser('chrome').usingServer('http://localhost:4444/wd/hub').build(); }); test.it('搜索sublime', function() { driver.get('http://www.baidu.com'); driver.findElement(By.name('wd')).sendKeys('sublime'); driver.findElement(By.id('su')).click(); driver.wait(until.titleIs('sublime_百度搜索'), 10000); }); test.it('搜索webstorm', function() { driver.get('http://www.baidu.com'); driver.findElement(By.name('wd')).sendKeys('webstorm'); driver.findElement(By.id('su')).click(); driver.wait(until.titleIs('webstorm_百度搜索'), 10000); }); test.it('搜索atom', function() { driver.get('http://www.baidu.com'); driver.findElement(By.name('wd')).sendKeys('atom'); driver.findElement(By.id('su')).click(); driver.wait(until.titleIs('atom_百度搜索'), 10000); }); test.after(function() { driver.quit(); }); });
建立 ui_tests/test3.js 文件
1
2
3
4
5
6
7
8
9
10
11
12
13
14
15
16
17
18
19
20
21
22
23
24
25
26
27
28
29
30
31
32
33
34
35
36
37
38
var webdriver = require('selenium-webdriver'), By = webdriver.By, until = webdriver.until, test = require('selenium-webdriver/testing'); test.describe('百度搜索测试3,ie测试', function() { this.timeout(15000); var driver; test.before(function() { driver = new webdriver.Builder().forBrowser('internet explorer').usingServer('http://localhost:4444/wd/hub').build(); }); test.it('搜索webdriver', function() { driver.get('http://www.baidu.com'); driver.findElement(By.name('wd')).sendKeys('webdriver'); driver.findElement(By.id('su')).click(); driver.wait(until.titleIs('webdriver_百度搜索'), 10000); }); test.it('搜索selenium', function() { driver.get('http://www.baidu.com'); driver.findElement(By.name('wd')).sendKeys('selenium'); driver.findElement(By.id('su')).click(); driver.wait(until.titleIs('selenium_百度搜索'), 10000); }); test.it('搜索mocha', function() { driver.get('http://www.baidu.com'); driver.findElement(By.name('wd')).sendKeys('mocha'); driver.findElement(By.id('su')).click(); driver.wait(until.titleIs('mocha_百度搜索'), 10000); }); test.after(function() { driver.quit(); }); });
然后
可以看到
以上就是一次完整的 UI 测试。
测试覆盖率 测试覆盖率是针对单元测试的指标,他有下面几个维度:
行覆盖率(line coverage):是否每一行都执行了?
函数覆盖率(function coverage):是否每个函数都调用了?
分支覆盖率(branch coverage):是否每个 if 代码块都执行了?
语句覆盖率(statement coverage):是否每个语句都执行了?
我们来实践一下。
1 npm install istanbul --save
建立 utils/ifElseTest.js 文件
1
2
3
4
5
6
7
8
9
module.exports = function(a) { if (a < 10) { return 666; } else if (a >= 10 && a < 20) { return 777; } else { return 888; } };
建立 test/ifElseTest.test.js 文件
1
2
3
4
5
6
7
8
9
10
11
12
13
14
15
var expect = require('chai').expect; var ifElseTest = require('../utils/ifElseTest'); describe('ifElseTest 方法测试', function() { it('expect(ifElseTest(5)).to.be.equal(666);', function() { expect(ifElseTest(5)).to.be.equal(666); }); it('expect(ifElseTest(6)).to.be.equal(666);', function() { expect(ifElseTest(6)).to.be.equal(666); }); it('expect(ifElseTest(17)).to.be.equal(777);', function() { expect(ifElseTest(17)).to.be.equal(777); }); });
改写 package.json 中的 scripts 部分:
1
2
3
4
5
6
7
8
9
10
11
12
13
14
15
16
17
18
19
20
21
22
{ "name": "fe_tests_example", "version": "1.0.0", "description": "", "main": "index.js", "scripts": { "test": "mocha ./test/*.js", "test-cov": "./node_modules/.bin/istanbul cover ./node_modules/mocha/bin/_mocha ./test/*.test.js" }, "repository": { "type": "git", "url": "http://gitlab.futunn.com/evanyan/fe_tests_example.git" }, "author": "", "license": "ISC", "dependencies": { "chai": "^4.0.2", "mocha": "^3.4.2", "selenium-webdriver": "^3.4.0", "istanbul": "^0.4.5" } }
然后:
可以看到:
1
2
3
4
5
6
7
8
9
10
11
12
13
14
15
16
17
18
19
20
21
22
23
24
25
26
27
28
29
30
31
λ npm run test-cov > fe_tests_example@1.0.0 test-cov D:\work\fe_tests_example > istanbul cover ./node_modules/mocha/bin/_mocha ./test/*.test.js add 方法测试 √ 2+2=4 √ 5+6=11 √ 0+(-2)=-2 ifElseTest 方法测试 √ expect(ifElseTest(5)).to.be.equal(666); √ expect(ifElseTest(6)).to.be.equal(666); √ expect(ifElseTest(17)).to.be.equal(777); 6 passing (199ms) ============================================================================= Writing coverage object [D:\work\fe_tests_example\coverage\coverage.json] Writing coverage reports at [D:\work\fe_tests_example\coverage] ============================================================================= =============================== Coverage summary =============================== Statements : 87.5% ( 7/8 ) Branches : 83.33% ( 5/6 ) Functions : 100% ( 2/2 ) Lines : 87.5% ( 7/8 ) ================================================================================
此时项目中生成了 coverage 文件夹,打开 coverage/lcov-report/index.html,可以看到:
可以看到,ifElseTest.js 中,其中有一个 if-else 代码块没有被测到。
1
2
3
4
5
6
7
8
9
10
11
12
13
14
15
16
17
18
var expect = require('chai').expect; var ifElseTest = require('../utils/ifElseTest'); describe('ifElseTest 方法测试', function() { it('expect(ifElseTest(5)).to.be.equal(666);', function() { expect(ifElseTest(5)).to.be.equal(666); }); it('expect(ifElseTest(6)).to.be.equal(666);', function() { expect(ifElseTest(6)).to.be.equal(666); }); it('expect(ifElseTest(17)).to.be.equal(777);', function() { expect(ifElseTest(17)).to.be.equal(777); }); it('expect(ifElseTest(88)).to.be.equal(888);', function() { expect(ifElseTest(88)).to.be.equal(888); }); });
然后
可以看到:
1
2
3
4
5
6
7
8
9
10
11
12
13
14
15
16
17
18
19
20
21
22
23
24
25
26
27
28
29
30
31
32
λ npm run test-cov > fe_tests_example@1.0.0 test-cov D:\work\fe_tests_example > istanbul cover ./node_modules/mocha/bin/_mocha ./test/*.test.js add 方法测试 √ 2+2=4 √ 5+6=11 √ 0+(-2)=-2 ifElseTest 方法测试 √ expect(ifElseTest(5)).to.be.equal(666); √ expect(ifElseTest(6)).to.be.equal(666); √ expect(ifElseTest(17)).to.be.equal(777); √ expect(ifElseTest(88)).to.be.equal(888); 7 passing (50ms) ============================================================================= Writing coverage object [D:\work\fe_tests_example\coverage\coverage.json] Writing coverage reports at [D:\work\fe_tests_example\coverage] ============================================================================= =============================== Coverage summary =============================== Statements : 100% ( 8/8 ) Branches : 100% ( 6/6 ) Functions : 100% ( 2/2 ) Lines : 100% ( 8/8 ) ================================================================================
可以看到测试覆盖率达到 100%,被测代码的每一行都被测到。
具体实践的一些建议
所有测试代码,都应该放在 test 文件夹中
单元测试测逻辑部分,被测代码的测试覆盖率尽量达到 100%;端对端测试测试主要流程是否能跑通,针对前端 ui 组件,还有查看组件在不同浏览器下表现的任务。所以,单元测试的测试量应该比端对端测试大很多。
单元测试只测逻辑部分代码,io 操作、dom 操作的代码不纳入单元测试范畴中。
io 操作、dom 操作的测试由端对端测试来完成。
参考 mocha api 文档 chai api 文档 selenium-webdriver api 文档